Why The Foot Pain Is Connected To The Neck Pain: Your Movement Patterns Shape Your Body

In the yoga world, if we get pain somewhere in the body, we take it as a call to action and begin to stretch that particular area. This approach is often ineffective, because in the words of prominent physiotherapist Diane Lee “It’s the victims who cry out, not the criminals.” This statement requires a fundamental shift in perspective – just because something is hurting doesn’t mean that it is the source of the problem. Now why is that? Why does the old pain in your right foot eventually shows up as tension in the neck? This happens because of fascia.

Fascia is that cotton candy-like connective tissue, that for hundreds of years had been carefully scraped off by anatomists to expose muscles and bones, and considered irrelevant. In the last couple of decades, however, fascia has been reclaiming it’s role as a vital whole-body communication network.

So what is fascia and why should we, yoga teachers and practitioners, care about it? Fascia is the connective tissue that serves both as a bag that holds muscles , bones, organs, etc, and the packing material in between those structures. It is comprised mostly of collagen fibers. For example, when you look at an individual muscle, you will see that fascia wraps individual muscle fibers, groups of fibers and muscle as a whole, becoming more dense toward the end and forming a tendon, which then seamlessly blends into the fascia that envelops the bone.

Muscle-structure.png

“Without it’s [fascia’s] support, the brain would be runny custard, the liver would spread through the abdominal cavity, and we would end up as a puddle at our own feet.” (1)

So the fascial system is an all-pervading physiological network, as important as the circulatory and nervous systems. It is a vast and truly fascinating subject, if you are interested in how the body works. Here we will focus on two qualities of fascia – its continuity and its ability to transmit tension.

As yoga teachers we always concern ourselves with the idea of connection (hence the definition of yoga as “union” or “linking”), yet we often fall into the mechanistic view of the body as a system of levers and pulleys. We tell students that “this pose stretches this muscle”, as if anything in the body works in isolation. In the world of fascia the muscle is linked to the bone, which is linked to the ligament, which is linked to another bone, and then a tendon and another muscle, etc. It’s perfectly fine to study muscle action, characteristics of ligaments, etc. as long as we remember that they are all part of an interconnected fabric within the body and affect each other constantly.

Beyond linking everything to everything, fascia has an important role of communicating mechanical information by the interplay of pulls and pushes. Just like a snag on a sweater can run across the fabric, the tension is transmitted in the same way from one place in the body to another via a fascial net. A human body is a constant interplay of internal and external forces that need to be balanced and distributed. As a result, there are predictable patterns of tension throughout the body that are necessary to keep us upright and allow a wide range of movement. “Strain, tension (good and bad), trauma, and movement tend to be passed though the structure along these fascial lines of transmission.”(1)

To describe those predictable lines of tension, Thomas Myers had adopted the term myofascial meridians (not to be confused with acupuncture meridians – a bit different). A myofascial meridian basically describes a line of tension that runs through a sheet of fascia that connects and envelops several muscles. I can’t help but think of a silly cartoon from my childhood of a cat and a dog pulling on a sausage link.

It is kind of like that. The casing of the sausage link is like fascia, while muscles form the contents. When it’s pulled in the opposite directions, the tension is created that is transmitted throughout the entire length.

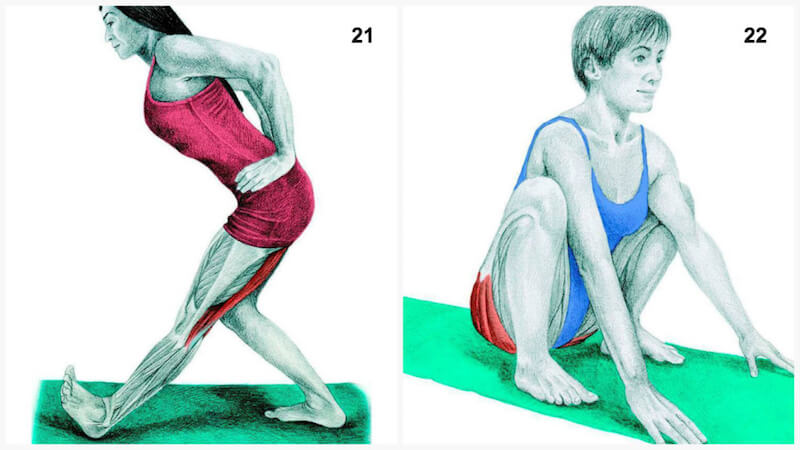
Let’s take a look at two “cardinal “ myofascial meridians: Superficial front line and Superficial back line. Just by looking at them it is obvious that SBL and SFL need to balance each other to support the upright position. If the SBL becomes too tight and shortens, you will end up with a “military” posture with some or all posterior (back) muscles shortened and bunched, and the anterior (front) muscles pulled and strained. Or the reverse can be true as well in a “collapsed” posture with a rounded thoracic spine and flattened lumbar curve. The military posture might come with tight hamstrings, but if you only focus on stretching the hamstrings, you won’t resolve the issue. This is where we need to look at the body wholistically (as a whole) and identify the patterns of tension that run throughout

PosturesDiscussed.png

Some patterns of tension are predictable because of body’s organization; others are unique because of the movement patterns, past injuries, etc. Basically, your body responds to the loads that you put on it. For example, one of my former students who spent 30 years driving a folklift in this position, developed his own unique pattern of tension that spiraled around his body and manifested as severe hip and sacrum pain. Just working on his hips wouldn’t be enough, since his hips were the “victims” of this entire unfortunate movement pattern.

In words of Brooke Thomas, “We become the shapes and movements that we make most of the time.”(2) And those patterns do not go away when we go to a yoga class. If a student of mine is used to hiking her right hip up while walking, she will do the same thing while attempting the tree pose. This is where awareness comes in. If we do our yoga practice on autopilot, we reinforce the patterns that we already have. If we pay close attention to what we are doing, we have a chance to overcome those habitual movement patterns. This is one of the reasons we repeat each pose a few times before we hold it – it gives us an opportunity to examine our movement patterns and correct them if necessary (read more about it).

RESOURCES

1. Thomas W. Myers Anatomy Trains: Myofascial Meridians for Manual and Movement Therapists   – In-depth exploration of fascia and myofascial meridians with extensive list of references.

2. Brook Thomas Why fascia matters  – Free, down-to-earth, fun look at fascia and why it matters.


This aeticle originally appeared on sequencewiz.org and was written by Olga Kabel

These Pictures Will Help You See Which Muscle You’re Stretching

Stretching is something not enough of us do, but its importance is critical. But it’s hard to see which muscle you’re stretching, because your skin is in the way of viewing your muscular structure underneath!

Stretching helps send blood flow to your muscles and helps your joints move through their full range of motion. It improves your posture, gets rid of tightness, and lowers your risk of pain and injury.

With these 36 pictures (created by Vicky Timon, a yoga expert and author of “Encyclopedia of Pilates Exercises”), you’ll be able to choose the best stretches for your goals. As you stretch, make sure you focus on your breath and move through these movements as naturally as possible.

It can take 5-30 seconds for your muscles to relax back into their natural positions, so take it slow, breathe through it, and help heal your body!


1. Camel Pose

Muscle Stretched: Rectus Abdominus and External Obliques.

Also known as the “heart opening” yoga pose, camel is great for helping clear the heart and throat centres. It should not be performed if you have a low back or neck injury. It is most appropriate for those who already have good flexibility. Come on your knees and place the knees hip-width apart, body upright. Place your hands on your lower back, pushing your hips forward. Slowly drop your head back and reach for your feet if your hips remain pushed forward, but don’t put your hands back on your feet if your hips fall back. Do not put too much pressure on your lumbar spine. Once in full position, keep pushing your chest up into the air.

2. Wide Forward Fold

Muscle Stretched: Adductors.

A great stretch for helping open the hips. Bend your knees and hold your spine straight. As your muscles begin to release, straighten your legs, round your back and reach for your feet. Pull on the bottom balls of your feet to release the calf muscles. If you are new to this pose, you likely will not be able to reach your feet. Simply keep your hands on your calves and stretch down.

Yoga3_4-1024x576.jpg

3. Frog Pose

Muscle Stretched: Adductors.

One of the most deepest stretches for the groin, frog pose is one of my favourites. Perform it on a soft surface to avoid putting too much pressure on the knees. Rest your hands and knees, and then bring your knees wider until you can feel your groin muscles starting to stretch. Push your hips back and forward lightly to ease into the stretch.

4. Wide Side Lunge Pose

Muscle Stretched: Adductors.

Put both your feet forward in a wide stance and hold your legs as straight as possible. With your hands, walk to your right foot and bend your right knee and rotate your left toes up to the ceiling, sitting in your right hip. Make sure your right foot stays flat on the ground.

5. Butterfly Stretch

Muscle Stretched: Adductors

This one is great for stretching the inner thighs. Bring the soles of your feet together and sit tall through your sit bones. Put some pressure on your knees, using your hands, or if you are really advanced, get someone to stand on top of you with their feet on either leg. For a deeper groin stretch, hold your feet closer to your body. You can also bend your body forward over your feet for more effect.

6. Forearm Extensor Stretch

Muscle Stretched: Forearm Extensor.

Begin with your arm in front of you with your wrist flexed toward the inner portion of your forearm. You should feel a stretch int he muscles that line your outer forearm. This stretch can be developed by touching the tips of your fingers together in the shape of a tea cup.


7. Lateral Side Flexion of the Neck

Muscle Stretched: Sternocleidomastoid “SCM”.

Look forward and don’t let the chin drop down for this stretch. Slowly move your ear towards the shoulder, without letting your shoulder lift up. A more advanced variation would be to sit on a chair and hold onto the bottom of the seat with both hands. This will make the tension down your arm and neck consistent, letting you target the upper traps.

8. Neck Rotation Stretch

Muscle Stretched: Sternocleidomastoid “SCM”.

Start rotating your neck slowly, while keeping your chin a bit elevated. For a deeper stretch, put pressure with the opposite hand from the direction that you are rotating.


9. Neck Extension Stretch

Muscle Stretched: Sternocleidomastoid “SCM”.

Put your hands on your hips, while keeping your spine long. Start to tilt your head back, ensuring that you are not collapsing your cervical spine.

10. Lateral Side Flexion of the Neck with Hand Assistance

Muscle Stretched: Sternocleidomastoid “SCM” and Upper Trapezius.

Look forward and don’t let the chin drop down for this stretch. Slowly move your ear towards the shoulder, with gentle pressure from your hand (without letting your shoulder lift up).

Yoga11_12-1024x576.jpg


11. Half Kneeling Quad / Hip Flexor Stretch

Muscle Stretched: Psoas and Quadriceps.

Start by half-kneeling. Then, bring forward the right hip. You should start feeling a stretch in the front of your hip while you do so. Take your back foot and squeeze your back flute in order to add to the stretch on your hip flexors.

12. Forearm Extensor Stretch

Muscle Stretched: Forearm Extensor.

Rotate your should towards the outside to get into the optimal forearm-stretching position. When you have come into this position, put pressure on your opposing hand to start the stretch.


13. Lateral Shoulder Stretch

Muscle Stretched: Side Deltoid.

Stand up tall with your right (or left) arm extended and holding your right elbow with your left hand (or vice versa). Slowly pull it across your chest until you feel a gentle stretch in your shoulder.

14. Standing Assisted Neck Flexion Stretch

Muscle Stretched: Trapezius Muscle.

I really love this stretch, as it gets the muscles in the back of the neck and shoulders, where we hold a lot of tension. Stand on the ground with your feet together. Slowly sit your hips back, making sure the spine is prolonged. Round your upper back, pushing your chin into your chest at the same time.


15. Lat Stretch with Spinal Traction

Muscle Stretched: Latissimus Dorsi.

Take a firm grip of a bar and slowly lift your feet off the ground. You will feel the stretch in your chest and lats. If you have taken your feet totally off the ground, you will feel traction in your lumbar spine. Do not perform this stretch if you have undergone any type of shoulder injury or have impingement of the shoulder.

16. Lat Stretch at the Wall

Muscle Stretched: Latissimus Dorsi.

Put both of your hands on the corner of a wall or post. Maintaining a long spine, gently push your hips out to the side. People with lower back problems should not perform this stretch.

17. Child’s Pose

Muscle Stretched: Latissimus Dorsi.

A very relaxing stretch, this one starts with you on the ground with your hands and knees on the floor. Slowly bring your hips back until your forehead is on the floor. If you want a better hip stretch, bring your knees wider. Your upper back should be in arch shape, and then you should externally rotate your shoulder to stretch your chest and lat muscles.

18. Standing Calf Stretch

Muscle Stretched: Soleus and Gastrocnemius.

This can be performed on the edge of a stair step or wall. Rotate your ankles a bit towards inside and outside to actively stretch your calf muscles.

19. Front Split

Muscle Stretched: Psoas and Hamstring.

If you are new to stretching and yoga, do not perform the front split. Begin in a position of kneeling lunge, and slowly lower your hips to the ground, while keeping them square to the ground. Use your hands for support on either side of you. If you feel any pain, get out of the pose immediately. You can also use the support of a chair while your hip flexors and hamstrings release.

20. Seated Forward Fold / Seated Toe Touch

Muscle Stretched: Hamstrings and Calfs.

Sit into your seat bones and bend your knees if you have to. Make sure your spine is as straight as possible as you grab your feet and pull forward and down. If you can’t reach your feet, reach the next thing closest, like your calves (or bend your knees).


21. Single Leg Forward Bend

Muscle Stretched: Hamstrings.

Have your feet positioned one in front of the other. Keep your back straight, and bring your hands to your hips and start bending from the hips.

22. Deep Squat

Muscle Stretched: Glutes.

A deep squat is great for many body areas. If you have knee problems, or you can’t keep your heels on the ground, perform your squat before proceeding. Stand your feet shoulder-width apart and gradually lower into the deep squat. When you get into the position of a deep squat, bring your arms inside your legs and put some pressure to the inside of your knees, sitting into the hips and heels. This can also be performed lying on the back with the feet against a wall.


23. Seated Half King Pigeon Pose

Muscle Stretched: Glutes.

Start in a seated position and slowly pull your leg to your chest and rotate your hip towards the outside, while keeping your spine straight. The stretch should be felt in the glute.

24. Standing Calf Stretch at the Wall

Muscle Stretched: Soleus and Gastrocnemius.

Get in a lunge position and have the back of your foot turned out a little. Gradually bring the back of your heel to the floor to stretch your calf muscles.


25. Lateral Flexion at the Wall

Muscle Stretched: External Obliques.

Keep your spine long, and slowly push your hips to the outside. If you have issues with your lower back, do not perform this stretch!

26. Supine Twist

Muscle Stretched: Glutes and External Obliques.

This is a great stretch for the IT band in the leg, and is beneficial for those suffering from sciatica pain, who are trying to get rid of it. Start by lying flat on your back and then bring one leg across your body. Gradually rotate your gaze and upper body in the opposite direction. Breath into this one to help open up your rib cage and sacroiliac joint and hip area. If this is too hard for you, stack your knees on top of one another – doing this will make you feel the stretch more in the upper spine when the knees are higher, and more in the lumbar spine when the knees are lower.

27. Lateral Flexion with a Dowel

Muscle Stretched: External Obliques and Latissimus Dorsi.

Keep your spine long, and gradually push your hips out to the side while keeping your shoulders rotated outwardly while holding onto a dowel. If your lower back hurts, do not perform this stretch.

28. Triangle Pose

Muscle Stretched: External Obliques.

The master pose, triangle. Begin with a wide stand and your front foot straight ahead, and your back foot at a 90 degree angle. Put your hand on your front leg or on the floor, and sit back into your front hip, keeping your back straight. Rotate away from your front leg and maintain your gaze at the hand that is in the air. Eventually you can do this pose by bending your foot that is at the 90 degree angle so that you are in a lunge almost, with hips facing forward.


29. Chest Stretch at the Wall

Muscle Stretched: Pectorals.

Stand facing a wall. Place your right palm on the wall so that it is in line with your shoulder. Keep your right hand planted firmly and bend your left arm behind you to encourage opening of the left shoulder. Now, walk your feet to the left and stop when you feel a good stretch in your right shoulder and chest. Repeat on the other side.

30. Assisted Chest Stretch

Muscle Stretched: Chest and Latissimus Dorsi.

Lie down not he floor and hold your palms faced up. Your partner should be in a deep squat just a little behind where your head is rested, while holding your hands. This stretch will be felt in your chest and lats, and should also cause some traction in your spine. If your shoulder dislocates or has dislocated recently, do not perform this stretch.


31. Seated Half Pigeon Variation

Muscle Stretched: Anterior Tibialis.

Sit with your feet positioned in front of you, and put one hand behind you and rotate your hip outwardly and put one foot above your knee. If you want to add to the stretch on your hip, lean forward and start the movement by hinging at the hips.

32. Supine Shoulder External Rotation Stretch

Muscle Stretched: Subscapularis.

Lay flat on your back and place your arm straight out to the side with your elbow at a 90 degree angle. Gradually bring the back of your hand to the floor. If this is not possible, it means your rotator cuff and other muscles that control internal rotation are tight. Breathe into the stretch and press the back of your hand down as much as possible without pain.


33. Down Dog Variation at the Wall

Muscle Stretched: Pectorals and Latissimus Dorsi.

Stand in front of a wall of rack, enough so that when your body is in a parallel position, you will have enough room. Pivot at the hips, making sure your spine is straight at all times. Move your chest forward and make a slight arch in your upper back and stretch your lats and chest muscles. If your hamstrings are too tight, bend at the knees slightly.

34. Assisted Chest Stretch Variation

Muscle Stretched: Pectorals.

Lie down on the floor, with your face down and palms facing down. Your partner will stand on top of you, and pull your hands back. You should feel a deep stretch in your chest muscles. If your shoulder dislocates easily or if you have had any kind of shoulder injury recently, do not perform this stretch.

This article was originally posted at beyoungbegreen.


Read more at http://livelovefruit.com/34-pictures-help-you-see-which-muscle-youre-stretching/#jUguzq5vbIYIcfg5.99

20 Epsom Salt Uses - Why You Need it in Your Home

Epsom Salts – chemically known as magnesium sulfate – are named after the spring in Surrey, England where the naturally-occurring mineral was discovered in the water. A must have natural remedy for every home, Epsom salts may be used topically or taken internally. Read on to learn about the many incredible health benefits and uses for Epsom salts.

1. Relax Your Body

Epsom salts dissolved in warm water – like those in an Epsom salt bath – are easily absorbed through the skin where they immediately go to work inside our bodies. The magnesium ions break apart from Epsom salt molecules and begin to relieve stress by promoting the production of serotonin and reducing the effects of adrenaline. Magnesium also plays a critical role in the production of energy in cells, helping us to feel invigorated without causing feelings of restlessness or anxiety.

To find out how to make your own Epsom salt bath and nine reasons you should have a soak in one today, have a read of our recent article here. 

Recommended Reading: How To Use Essential Oils To Beat Anxiety: 12 Experts Reveal Their Secrets

2. Relieve Pain and Cramping

Epsom salts absorbed through the skin also work to relieve muscle tension, pain, and inflammation in joints. Submerge yourself in a warm Epsom salt bath to alleviate tension headaches or soothe abdominal cramps. Tired and sore feet will also benefit from the therapeutic warmth of an Epsom salt soak.

(Recommended Reading: 10 Potent Foods That Kill Pain Fast)

3. Muscle and Nerve Function

Aside from relieving tension, pain, and cramping, Magnesium sulfate has several other positive effects on the human body. It aids in many enzymatic functions, helps to regulate fluid retention in cells, and facilitates the body’s use of calcium to transmit chemical signals throughout the nervous system.

4. For Arterial Health

Epsom salts may help to improve circulation and prevent serious cardiovascular illness by decreasing inflammation and protecting the elasticity of arteries. Healthier arteries means less risk of blood clots, plaque build-up, and damage to arterial walls. Try soaking in an Epsom salt bath three to four times per week to reduce stress, lower blood pressure, and improve your cardiovascular health.

(Further reading: 9 Clever Ways To Naturally Clear Arteries)

5. Regulate Blood Sugar

Both magnesium and sulfate help to improve the body’s ability to produce and use insulin. Regular intake of Epsom salts – either orally or transdermally – may help to regulate blood sugar, lowering the risk of diabetes and improving your overall daily energy levels.

6. Relieves Constipation

One of Epsom salt’s more popular uses is as a saline laxative. Dissolve one teaspoon of Epsom salts into a cup of warm water and drink. Note, this remedy should not be used more than once per day. If symptoms persist for more than a few days, it is always recommended to consult with a physician.

7. Helps to Remove Splinters

To dislodge a stubborn splinter, simply soak the affected body part in warm water and Epsom salts for a few minutes. Magnesium sulfate will reduce the inflammation around the wound and soften up the splinter, making it much easier to remove.

8. Soothe Sprains and Bruises

Anti-inflammatory Epsom salts can be used to alleviate the soreness from sprains and bruises. Just add two cups of salts to your warm bath water and soak away the ache.

9. Keep Feet Healthy

It’s pretty common knowledge that soaking your feet in Epsom salts is good for soothing away aches and pains. But did you know that it can also help to treat athlete’s foot and toe nail fungal infections? Simply add a half cup of Epsom salts to warm water and soak your feet for as long as you want (or until the water gets cold) to alleviate the itching and burning and help heal feet faster.

(Further reading: Top 10 Natural Remedies For Toenail Fungus)

10. Ease Discomfort of Gout

Add a couple of tablespoons of Epsom salts to hot water and soak body parts affected by gout. Magnesium sulfate quickly soaks through skin and into the swollen, aching joints to help alleviate pain and inflammation.

11. Exfoliate Your Skin

By rubbing a handful of Epsom salts over damp skin, you can easily remove dead cells, helping your skin to look healthier and feel softer. Use this treatment on hands, feet, and everything in between.

(Further reading: 23 Stunning Scrub Recipes)

12. Natural Face Cleanser

At night before bed, mix a teaspoon of Epsom salts with your regular cleanser for an easy daily treatment or use this recipe for an exfoliating face mask, compliments of preparednessmama.com:

Finely chop a small ripe tomato and mix in one pureed egg white, half a teaspoon of vitamin B5 powder, one teaspoon each of aloe vera gel and Epsom salts, and a couple of drops of Thyme essential oil. Apply mixture to face for 15 minutes then rinse with lukewarm water for an excellent clarifying skin treatment.

13. Dislodge Blackheads

Use Epsom salts to remove dead skin and oil from your pores. First, you’ll want to exfoliate to remove any dead skin from around the outsides of the blemishes. Then mix one teaspoon of Epsom salts and four drops of iodine into half a cup of hot water. Stir until salts are completely dissolved and let the mixture cool until it is still warm, but not hot. Massage the mixture into skin affected with blackheads, let it dry completely, then wash your face with warm water and pat dry with a clean cloth.

(Further reading: 8 Quick Natural Remedies For Blackheads)

14. Remove Styling Product Build-up

To remove build-up of hairspray or other styling product from your hair, mix one cup each of Epsom salts and lemon juice into a gallon of water. Cover and let the concoction sit for 24 hours before using. Then simply pour over hair and leave it on for about 15 – 20 minutes. Follow up with a wash and condition as usual.

15. Add Volume to Hair

To add body to your hair, try mixing equal parts all-natural, sulfate-free deep conditioner and Epsom salts. Warm the mixture to slightly above body temperature then work through hair. Leave in for 15 – 20 minutes then rinse. Feel free to follow up this hair treatment by waving your hair around your face (like the people in those television commercials for chemical hair products) and remember: Laughter is a great natural remedy for all kinds of things!

(Further reading: 28 Best Herbs For Hair Growth)

16. Wash Pots and Pans

Pour a small amount of Epsom salts into those really-dirty dishes before you scrub them. The abrasive texture of the salt crystals will help to remove stuck-on food more easily without hurting your cookware.

17. Clean Tile and Grout

Mix equal parts Epsom salts and liquid dish detergent to create a super effective tile and grout cleaner. Apply this mixture to dirty or stained surfaces in the bathroom, kitchen, or even outside and allow it to soak in for a minute or two. Then scrub away the loosened grime and rinse clean.

18. As a Hand Wash

Mix equal parts Epsom salts and baby oil to create a moisturizing hand cleanser. Store this mixture in bottles next to all of the sinks around your home and use regularly to keep hands soft and clean.

19. Removes Detergent Build-up

Over time, laundry detergent and other contaminants may build up inside machines. Use Epsom salts to remove this unwanted gunk and keep your washer running more efficiently. Fill your empty washing machine with hot water, add a quart of clear vinegar and one cup of Epsom salts, let the machine agitate for about a minute, then stop the cycle and let the solution soak for about an hour. For more details on this procedure, check out this how-to guide.

20. In The Garden

Magnesium sulfate may be used to fertilize your plants, green up your lawn, remove unwanted insect pests, and prevent slugs among other things. Check out this article for ten incredible Epsom salt uses in the garden.

This article originally appeared on naturallivingideas.com and is written by Janice Taylor.


Kinesiology Reveals Precisely Where the Problem is & Exactly What it Needs to be Healed

The word 'Kinesiology' comes from the Greek word kinesis, which means 'movement'. In the medical sciences this is the name given to the study of muscles and the movement of the body (biomechanics or traditional kinesiology). Kinesiology research and development can be traced back thousands of years to Aristotle (384-322 BC); Leonardo da Vinci (1429-1519) famous for his studies of human structure and function; Luigi Galvani who in 1780 discovered that muscular contraction was caused by electrical impulses produced by nerves.....

Muscle testing combined with Kinesiology techniques enables the practitioner to find out which systems are out of balance i.e. mental, chemical, structural or energetic – which could be one, several or them all. For someone to be truly healthy all four systems need to be functioning well and in harmony with each other. In my opinion Kinesiology is the only treatment which addresses all four areas and as such is truly holistic.

Kinesiology obtains positive results when other modalities including orthodox medicine have failed. The longer someone has had a problem the more likely it is that all the systems will need to be treated. More importantly is to find the underlying cause and to identify the factors which may be contributing to such imbalances.

Once you have all this information, then corrections can be applied to all four areas. Restoring this balance can have profound effects on people's lives.

Correction Techniques

Methods of strengthening a weak muscle may include firm massage to the tendons at its origin and insertion. If this method strengthens the weak muscle it may also benefit the muscles' related organ and health problems. For example, the pectoralis major clavicular muscle (PMC) is related to the stomach meridian and the stomach.

If the PMC tests weak, it may indicate digestive problems or emotional upsets.

Bilateral weakness may indicate a spinal fixation at T5 or T6.

In the 1930s American osteopath Frank Chapman discovered reflex points, now known as neurolymphatic reflex points (NLs), found on the front of the body in the intercostal spaces between the ribs and where they join the sternum and on the back where they meet the vertebra. Other NLs have since been discovered. When massaged they stimulate the elimination of excess lymph and may strengthen weak muscles. This is a very common correction used in treatments as most people have a sluggish lymphatic system due to lack of exercise.

Chiropractor and clinician Terence Bennett researched and mapped out vascular reflexes now known as neurovascular reflex points (NVs). These points are located mostly on the head and many are bilateral. They are treated by gently pressing them and tugging in different directions until a pulse can be felt, under the fingers. Once this pulse is felt, the points are pressed for about 20 seconds or until the pulsation stops. These points stimulate the vascular circulation to a specific organ and its related muscle. For example, NVs for the PMC are located bilaterally on the forehead halfway between the eyebrows and the hairline. Holding these points stimulates the circulation of the blood to the stomach and strengthens a weak PMC and can be extremely effective when used to treat emotional distress.

Kinesiologists are trained to test approximately 50 different muscles. Any one of these muscles which tests 'strong in the clear' (without stimulus) can be used as an indicator muscle to test for other things. Known as therapy localization, this is done by testing the indicator muscle at the same time as the client touches the site of an injury, for example. If the indicator muscle now tests weak it indicates a lesion, and further muscle tests will be undertaken to ascertain what corrections are needed.

Other correction techniques include holding or massaging acupuncture points, repeated muscle activation (RMA), reactivity, stretch weakness, testing for nutritional support or substances which weaken or strengthen the body. ICAK-approved techniques are only those that they have clinically researched and work for anyone who uses them.

Thanks to muscle testing and AK, a treatment is totally client led and will differ for each individual. People may have the same symptoms but the underlying cause may be different and therefore the treatment needed will be different. For example, ten clients could complain of headaches but there could be ten different reasons why.

Usually at the end of a treatment a client will be given advice of some kind which may include nutritional requirements, dietary changes, exercise or simple techniques to reduce stress.

The Benefits

The greatest application of Kinesiology is in dealing with everyday complaints for which no permanent cure has been found. The assessment techniques are good at identifying the causes of problems and can be very useful in pinpointing the sources of general unwellness and fatigue that have no obvious medical causes. As Goodheart said, "The body never lies". Kinesiology lets the body reveal precisely where the problem is and exactly what it needs in order to be healed, enabling problems to be corrected at source often permanently. Kinesiology is also ideal for preventative healthcare.

In more serious conditions, Kinesiology enables people to function as well as possible under the circumstances and to be supported towards better health. Sometimes different types of treatment may be needed at different times. For example, initially there may be structural problems to be dealt with, and once these have been treated emotional problems may surface. Emotional problems and stress can be treated very quickly without any need for in-depth psychoanalysis.

Specifically Kinesiology can help people with many common conditions including: allergies, chronic fatigue, asthma, eczema, candida, IBS, migraine headaches, insomnia, anxiety, phobias, low mood, weight problems, fluid retention, digestion problems, muscular and skeletal pain, arthritic pain, hyperactivity, breast congestion and much more. Because Kinesiology does not focus on specific symptoms, the list of health problems which it can help or alleviate is endless. By improving posture and coordination people have more stamina and less pain.

How Long Does it Last?

The number of treatments required varies depending on the condition being treated. Some problems are short term and can be sorted fairly quickly, some are chronic and may take much longer.

So, for example, if someone has had a health problem for years it may take longer to relieve than something that has developed fairly recently. Treatment lasts until whatever the stress on the body was that caused the imbalance recurs. Kinesiology assessment will try to discover what the stressors are and re-educate the body to stay in balance.

Is it Safe?

When practiced by people who are properly trained, Kinesiology cannot harm anyone. The techniques used for correction are simple and gentle. They work by enhancing the clients' energy, following the dictates of the clients' own body as to what is energy enhancing and what isn't. It is suitable for adults and children (including babies). People who are very sick or disabled in some way can be treated by using a surrogate.

Are There Any After-effects?

Treatments are powerful and deep-reaching and can bring about major energy changes which may make one feel tired or sleepy or other slight symptoms such as a headache or cold. Withdrawal from foods or substances causing intolerance or toxicity may cause unpleasant symptoms as the body detoxes. Fortunately they don't last too long, and can be seen as a good sign that healing is taking place. Healing effects can continue for days, weeks and even months after treatment.

Kinesiology Can Enhance Other Therapies

Kinesiology is the link, the lynch pin, which brings together all the different modalities which are currently taught in a fragmented way and often in competition with each other.

Combining therapies with Kinesiology can significantly enhance their efficacy and speed of recovery. Structural therapies such as physiotherapy, chiropractic, osteopathy, massage, reflexology can be enhanced by being able to treat, for example, emotional problems and stress which can cause tension in skeletal muscles which in turn can cause subluxations and postural imbalances.

Recurring structural problems may be caused by food intolerances or nutritional deficiencies. There is also the added advantage that using Kinesiology with its gentle muscle tests and corrections will also reduce the 'wear and tear' on the practitioner.

Mental or emotional therapies such as counselling, hypnotherapy, NLP, psychology may be enhanced by being able to test for food or chemical sensitivities which have been linked to hyperactivity and schizophrenia and other mental disturbances (Mackarness 1990) and headaches or migraine. Emotional traumas that could take years to treat in some instances can be resolved in minutes (Callaghan 2001).

Depression may be treated by addressing pain, structural problems or nutritional imbalances.

Healing in therapies such as nutrition, homeopathy or herbalism can be speeded up and enhanced by being able to muscle test to find the most appropriate remedy(ies). Problems with poor absorption or toxicity can be easily identified and treated. When symptoms have subsided, tests can be done later to evaluate whether a remedy is still relevant.

Dentists use Kinesiology in their practice to reduce stress or phobias in clients, and to correct TMJ subluxations which can cause back pain, sciatica and digestive problems. Nutrition can be recommended to eliminate anaesthetics from the body after surgery.

Acupuncturists have found that when they use Kinesiology in their treatments they are able to find the underlying imbalance much faster and a successful outcome is more likely. Bach Flower Remedies and Aromatherapy essential oils can be quickly identified using muscle tests. Chronic chakra imbalances may be rectified by correcting spinal fixations.

Educationalists and parents can do much to help children and adults with learning difficulties using Brain Gym exercises and by recommending testing for nutritional deficiencies and food sensitivities.

For more info visit: http://www.positivehealth.com/article/kinesiology/kinesiology-and-its-applications
Written by Pam Bracken