Yoga as Therapy for Individual Care

YOGA THERAPY uses the tools of yoga to achieve specific outcomes according to the needs of the individual. It is fast becoming an accepted health modality in Canada, offering all people, including those experiencing a wide range of ailments or disabilities, guidance and personal tools that they can use to enhance their life.

At Reset Wellness on Whyte we cater to your needs with two specialties within Yoga Therapy, emotional and physical support, and Private Hatha Yoga.

Being authentic means taking the elevator down inside ourselves and noticing whatever we happen to be experiencing right now. It may change from moment to moment.
— Dr. Sue Johnson

PHOENIX RISING YOGA THERAPY invites people into a safe, predictable and non-judgmental space to help find peace in the present moment. People will develop an awareness of, and begin to experience their bodies in new ways so that they can gain acceptance and a more compassionate relationship with their bodies. This then enables them to befriend, reclaim and feel safe in their bodies so that they can explore the interaction between their mind and their body.

Phoenix Rising Yoga Therapy invites people into a safe, predictable and non-judgmental space to help find peace in the present moment. People will develop an awareness of, and begin to experience their bodies in new ways so that they can gain acceptance and a more compassionate relationship with their bodies. This then enables them to befriend, reclaim and feel safe in their bodies so that they can explore the interaction between their mind and their body.

The effects of trauma whether from childhood abuse and/or, neglect, ignorance, assault, disaster, accident, injury, disease, illness or disability causes feelings of shock, pain, sadness and guilt. This then becomes locked in the body, causing unresolved stress and trauma with survivors becoming disconnected from, and untrusting of their bodies.

Phoenix Rising Yoga Therapy helps to unlock pain in a sensitive, supportive way, using especially chosen physical postures, breathing techniques and Yoga Psychology. It helps identify triggers, and face, accept and bear the effects of the trauma. It aids in increasing mental clarity, concentration and steadier emotions. It is not contorting the body into unattainable positions and people will work at their own capacity. Compassionately guided by Shari Arial, Edmonton's only Phoenix Rising Yoga Therapist.

Shari Arial, Phoenix Rising Yoga Therapist

Shari Arial, Phoenix Rising Yoga Therapist

Focus on keeping your spine straight. It is the job of the spine to keep the brain alert.
— B.K.S. Iyengar

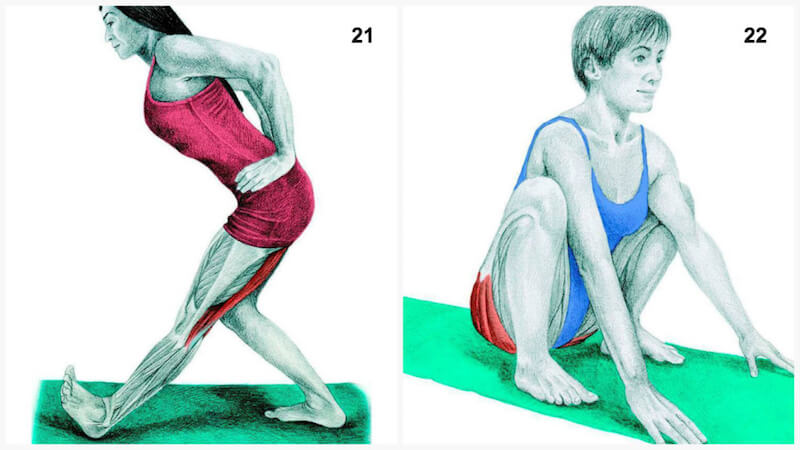
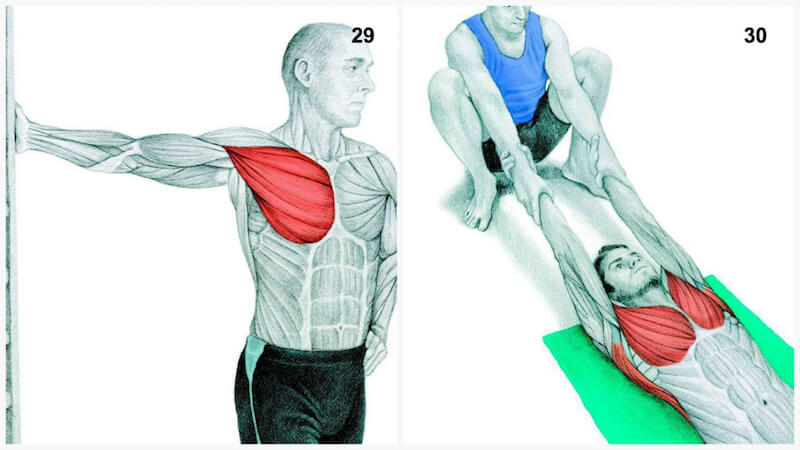
STRUCTURAL YOGA THERAPY invites people with alignment, functional or structural health issues to safely be supported through holistic, individualized treatment plans, helping people build confidence, balance, coordination, improved techniques, greater range of movement and strength. People will develop the awareness of physical imbalance at its true point, often away from the site of pain, and be taught how to move their body according to its needs. This enables a sense of ability and accomplishment in the individual, helping people feel their health is 'in their hands'.

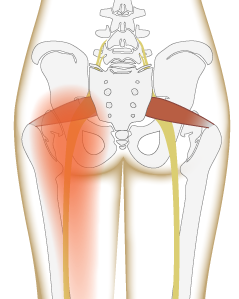
Injury, poor posture, weight issues, or disabilities have lingering effects on the whole body, affecting the integrity and strength of more than just the site of the issue, sometimes silently. Unresolved physical stress compounds locally, but also extends as a chain-reaction to surrounding tissues, organs, and systems. For those with acute or chronic pain, the chain-reaction is often predictable, a pattern of physical stress that can be turned around.

Structural Yoga Therapy helps move you in to better health and well-being in an attentive, supportive way, using specialized treatment plans to achieve your personal health goals overtime and within your limits. It helps foster a sense of connection and acceptance of your body, while teaching about the strategies and power in ourselves, to be the force behind our own health. Shari Arial can help you reach your goals of physical discipline, relaxation or transformation with a structural approach to Yoga Therapy.
 

Yoga teaches us to cure what need not be endured and endure what can not be cured
— B.K.S. Iyengar

PRIVATE HATHA YOGA invites people in to a safe, private environment to learn and practice yoga for their own personal sense of relaxation and achievement. Under the full, gentle attention of April Kosinski - Yin, Yang, Hatha and Myofascial Yoga Instructor - sessions are designed to gradually improve yoga skills, postures and techniques - according to your goals - helping build confidence within a practice. One on one sessions are 75 mins in a comfortable, quiet space, no other students around for the ultimate, tailored experience with yoga.

"Feeling sad? Sit in Lotus. Better yet, rise up into a backbend or soar royally into King Dancer Pose. While it’s not as simple as that, one study found that a consistent yoga practice improved depression and led to a significant increase in serotonin levels and a decrease in the levels of monoamine oxidase (an enzyme that breaks down neurotransmitters) and cortisol. At the University of Wisconsin, Richard Davidson, Ph.D., found that the left prefrontal cortex showed heightened activity in meditators, a finding that has been correlated with greater levels of happiness and better immune function. More dramatic left-sided activation was found in dedicated, long-term practitioners." -Timothy McCall, M.D. 

April Kosinski, Yoga Instructor

April Kosinski, Yoga Instructor

Learn More

These Pictures Will Help You See Which Muscle You’re Stretching

Stretching is something not enough of us do, but its importance is critical. But it’s hard to see which muscle you’re stretching, because your skin is in the way of viewing your muscular structure underneath!

Stretching helps send blood flow to your muscles and helps your joints move through their full range of motion. It improves your posture, gets rid of tightness, and lowers your risk of pain and injury.

With these 36 pictures (created by Vicky Timon, a yoga expert and author of “Encyclopedia of Pilates Exercises”), you’ll be able to choose the best stretches for your goals. As you stretch, make sure you focus on your breath and move through these movements as naturally as possible.

It can take 5-30 seconds for your muscles to relax back into their natural positions, so take it slow, breathe through it, and help heal your body!


1. Camel Pose

Muscle Stretched: Rectus Abdominus and External Obliques.

Also known as the “heart opening” yoga pose, camel is great for helping clear the heart and throat centres. It should not be performed if you have a low back or neck injury. It is most appropriate for those who already have good flexibility. Come on your knees and place the knees hip-width apart, body upright. Place your hands on your lower back, pushing your hips forward. Slowly drop your head back and reach for your feet if your hips remain pushed forward, but don’t put your hands back on your feet if your hips fall back. Do not put too much pressure on your lumbar spine. Once in full position, keep pushing your chest up into the air.

2. Wide Forward Fold

Muscle Stretched: Adductors.

A great stretch for helping open the hips. Bend your knees and hold your spine straight. As your muscles begin to release, straighten your legs, round your back and reach for your feet. Pull on the bottom balls of your feet to release the calf muscles. If you are new to this pose, you likely will not be able to reach your feet. Simply keep your hands on your calves and stretch down.

Yoga3_4-1024x576.jpg

3. Frog Pose

Muscle Stretched: Adductors.

One of the most deepest stretches for the groin, frog pose is one of my favourites. Perform it on a soft surface to avoid putting too much pressure on the knees. Rest your hands and knees, and then bring your knees wider until you can feel your groin muscles starting to stretch. Push your hips back and forward lightly to ease into the stretch.

4. Wide Side Lunge Pose

Muscle Stretched: Adductors.

Put both your feet forward in a wide stance and hold your legs as straight as possible. With your hands, walk to your right foot and bend your right knee and rotate your left toes up to the ceiling, sitting in your right hip. Make sure your right foot stays flat on the ground.

5. Butterfly Stretch

Muscle Stretched: Adductors

This one is great for stretching the inner thighs. Bring the soles of your feet together and sit tall through your sit bones. Put some pressure on your knees, using your hands, or if you are really advanced, get someone to stand on top of you with their feet on either leg. For a deeper groin stretch, hold your feet closer to your body. You can also bend your body forward over your feet for more effect.

6. Forearm Extensor Stretch

Muscle Stretched: Forearm Extensor.

Begin with your arm in front of you with your wrist flexed toward the inner portion of your forearm. You should feel a stretch int he muscles that line your outer forearm. This stretch can be developed by touching the tips of your fingers together in the shape of a tea cup.


7. Lateral Side Flexion of the Neck

Muscle Stretched: Sternocleidomastoid “SCM”.

Look forward and don’t let the chin drop down for this stretch. Slowly move your ear towards the shoulder, without letting your shoulder lift up. A more advanced variation would be to sit on a chair and hold onto the bottom of the seat with both hands. This will make the tension down your arm and neck consistent, letting you target the upper traps.

8. Neck Rotation Stretch

Muscle Stretched: Sternocleidomastoid “SCM”.

Start rotating your neck slowly, while keeping your chin a bit elevated. For a deeper stretch, put pressure with the opposite hand from the direction that you are rotating.


9. Neck Extension Stretch

Muscle Stretched: Sternocleidomastoid “SCM”.

Put your hands on your hips, while keeping your spine long. Start to tilt your head back, ensuring that you are not collapsing your cervical spine.

10. Lateral Side Flexion of the Neck with Hand Assistance

Muscle Stretched: Sternocleidomastoid “SCM” and Upper Trapezius.

Look forward and don’t let the chin drop down for this stretch. Slowly move your ear towards the shoulder, with gentle pressure from your hand (without letting your shoulder lift up).

Yoga11_12-1024x576.jpg


11. Half Kneeling Quad / Hip Flexor Stretch

Muscle Stretched: Psoas and Quadriceps.

Start by half-kneeling. Then, bring forward the right hip. You should start feeling a stretch in the front of your hip while you do so. Take your back foot and squeeze your back flute in order to add to the stretch on your hip flexors.

12. Forearm Extensor Stretch

Muscle Stretched: Forearm Extensor.

Rotate your should towards the outside to get into the optimal forearm-stretching position. When you have come into this position, put pressure on your opposing hand to start the stretch.


13. Lateral Shoulder Stretch

Muscle Stretched: Side Deltoid.

Stand up tall with your right (or left) arm extended and holding your right elbow with your left hand (or vice versa). Slowly pull it across your chest until you feel a gentle stretch in your shoulder.

14. Standing Assisted Neck Flexion Stretch

Muscle Stretched: Trapezius Muscle.

I really love this stretch, as it gets the muscles in the back of the neck and shoulders, where we hold a lot of tension. Stand on the ground with your feet together. Slowly sit your hips back, making sure the spine is prolonged. Round your upper back, pushing your chin into your chest at the same time.


15. Lat Stretch with Spinal Traction

Muscle Stretched: Latissimus Dorsi.

Take a firm grip of a bar and slowly lift your feet off the ground. You will feel the stretch in your chest and lats. If you have taken your feet totally off the ground, you will feel traction in your lumbar spine. Do not perform this stretch if you have undergone any type of shoulder injury or have impingement of the shoulder.

16. Lat Stretch at the Wall

Muscle Stretched: Latissimus Dorsi.

Put both of your hands on the corner of a wall or post. Maintaining a long spine, gently push your hips out to the side. People with lower back problems should not perform this stretch.

17. Child’s Pose

Muscle Stretched: Latissimus Dorsi.

A very relaxing stretch, this one starts with you on the ground with your hands and knees on the floor. Slowly bring your hips back until your forehead is on the floor. If you want a better hip stretch, bring your knees wider. Your upper back should be in arch shape, and then you should externally rotate your shoulder to stretch your chest and lat muscles.

18. Standing Calf Stretch

Muscle Stretched: Soleus and Gastrocnemius.

This can be performed on the edge of a stair step or wall. Rotate your ankles a bit towards inside and outside to actively stretch your calf muscles.

19. Front Split

Muscle Stretched: Psoas and Hamstring.

If you are new to stretching and yoga, do not perform the front split. Begin in a position of kneeling lunge, and slowly lower your hips to the ground, while keeping them square to the ground. Use your hands for support on either side of you. If you feel any pain, get out of the pose immediately. You can also use the support of a chair while your hip flexors and hamstrings release.

20. Seated Forward Fold / Seated Toe Touch

Muscle Stretched: Hamstrings and Calfs.

Sit into your seat bones and bend your knees if you have to. Make sure your spine is as straight as possible as you grab your feet and pull forward and down. If you can’t reach your feet, reach the next thing closest, like your calves (or bend your knees).


21. Single Leg Forward Bend

Muscle Stretched: Hamstrings.

Have your feet positioned one in front of the other. Keep your back straight, and bring your hands to your hips and start bending from the hips.

22. Deep Squat

Muscle Stretched: Glutes.

A deep squat is great for many body areas. If you have knee problems, or you can’t keep your heels on the ground, perform your squat before proceeding. Stand your feet shoulder-width apart and gradually lower into the deep squat. When you get into the position of a deep squat, bring your arms inside your legs and put some pressure to the inside of your knees, sitting into the hips and heels. This can also be performed lying on the back with the feet against a wall.


23. Seated Half King Pigeon Pose

Muscle Stretched: Glutes.

Start in a seated position and slowly pull your leg to your chest and rotate your hip towards the outside, while keeping your spine straight. The stretch should be felt in the glute.

24. Standing Calf Stretch at the Wall

Muscle Stretched: Soleus and Gastrocnemius.

Get in a lunge position and have the back of your foot turned out a little. Gradually bring the back of your heel to the floor to stretch your calf muscles.


25. Lateral Flexion at the Wall

Muscle Stretched: External Obliques.

Keep your spine long, and slowly push your hips to the outside. If you have issues with your lower back, do not perform this stretch!

26. Supine Twist

Muscle Stretched: Glutes and External Obliques.

This is a great stretch for the IT band in the leg, and is beneficial for those suffering from sciatica pain, who are trying to get rid of it. Start by lying flat on your back and then bring one leg across your body. Gradually rotate your gaze and upper body in the opposite direction. Breath into this one to help open up your rib cage and sacroiliac joint and hip area. If this is too hard for you, stack your knees on top of one another – doing this will make you feel the stretch more in the upper spine when the knees are higher, and more in the lumbar spine when the knees are lower.

27. Lateral Flexion with a Dowel

Muscle Stretched: External Obliques and Latissimus Dorsi.

Keep your spine long, and gradually push your hips out to the side while keeping your shoulders rotated outwardly while holding onto a dowel. If your lower back hurts, do not perform this stretch.

28. Triangle Pose

Muscle Stretched: External Obliques.

The master pose, triangle. Begin with a wide stand and your front foot straight ahead, and your back foot at a 90 degree angle. Put your hand on your front leg or on the floor, and sit back into your front hip, keeping your back straight. Rotate away from your front leg and maintain your gaze at the hand that is in the air. Eventually you can do this pose by bending your foot that is at the 90 degree angle so that you are in a lunge almost, with hips facing forward.


29. Chest Stretch at the Wall

Muscle Stretched: Pectorals.

Stand facing a wall. Place your right palm on the wall so that it is in line with your shoulder. Keep your right hand planted firmly and bend your left arm behind you to encourage opening of the left shoulder. Now, walk your feet to the left and stop when you feel a good stretch in your right shoulder and chest. Repeat on the other side.

30. Assisted Chest Stretch

Muscle Stretched: Chest and Latissimus Dorsi.

Lie down not he floor and hold your palms faced up. Your partner should be in a deep squat just a little behind where your head is rested, while holding your hands. This stretch will be felt in your chest and lats, and should also cause some traction in your spine. If your shoulder dislocates or has dislocated recently, do not perform this stretch.


31. Seated Half Pigeon Variation

Muscle Stretched: Anterior Tibialis.

Sit with your feet positioned in front of you, and put one hand behind you and rotate your hip outwardly and put one foot above your knee. If you want to add to the stretch on your hip, lean forward and start the movement by hinging at the hips.

32. Supine Shoulder External Rotation Stretch

Muscle Stretched: Subscapularis.

Lay flat on your back and place your arm straight out to the side with your elbow at a 90 degree angle. Gradually bring the back of your hand to the floor. If this is not possible, it means your rotator cuff and other muscles that control internal rotation are tight. Breathe into the stretch and press the back of your hand down as much as possible without pain.


33. Down Dog Variation at the Wall

Muscle Stretched: Pectorals and Latissimus Dorsi.

Stand in front of a wall of rack, enough so that when your body is in a parallel position, you will have enough room. Pivot at the hips, making sure your spine is straight at all times. Move your chest forward and make a slight arch in your upper back and stretch your lats and chest muscles. If your hamstrings are too tight, bend at the knees slightly.

34. Assisted Chest Stretch Variation

Muscle Stretched: Pectorals.

Lie down on the floor, with your face down and palms facing down. Your partner will stand on top of you, and pull your hands back. You should feel a deep stretch in your chest muscles. If your shoulder dislocates easily or if you have had any kind of shoulder injury recently, do not perform this stretch.

This article was originally posted at beyoungbegreen.


Read more at http://livelovefruit.com/34-pictures-help-you-see-which-muscle-youre-stretching/#jUguzq5vbIYIcfg5.99

3 Types of Pain in the Butt and What You Can Do About It

Having a literal pain in the butt is not a fun experience; it can make walking, sitting and sleeping difficult and uncomfortable. It is certainly something that one would want gone as soon as possible, yet sometimes we unknowingly exacerbate the issue by trying to stretch the injured area. There is a special name for these types of practices – anga bangha. It basically means that you want to do something good but end up hurting yourself. Today we will explore three types of the pain in the butt and how you can avoid making your practice anga bangha.

Pain in the butt #1: Lower butt pain.

Many years ago I was preparing for a fitness competition and my routine included a split. One day, being young and silly, I plopped into the split right off the bat and heard “Crrkkhh” at the bottom of my right buttock. “Hmm, I thought, that didn’t sound too good”. I did manage to get out of the split, but ended up limping for couple of weeks and then dealing with the pain in the butt for months afterwards.

Location: This is the pain that you experience right in the crease of the buttock at the back of the thigh. It might give you trouble when you walk, but becomes especially pronounced when you bend forward with legs straight.

Offender: Hamstring tendon(s)

Reason: This type of pain is usually a sign of an injury to the tendon(s) that attach your hamstrings to the pelvis. It is usually a result of pulling on the hamstrings too enthusiastically, especially if they haven’t been warmed up properly. When yoga practitioners insist on keeping the legs straight in forward bends and then force themselves into a pose, they may end up injuring the tendon. Yoga teachers who demonstrate a lot in their classes are also at risk, since they are more likely to go into a difficult posture without proper preparation.

Common remedy: Here is the paradox – when the tendon becomes injured, the hamstring muscles naturally contract, trying to prevent further damage to the tendon. And we think – my hamstrings feel tight and painful, if I only stretch them the pain will go away. So instead of allowing the tendon to heal, we keep reinjuring it by actively stretching the hamstrings. This cycle can go on for a very long time.

Better solution: Give your tendon(s) a chance to heal. This means contracting the hamstrings to increase circulation to the area, bending the knees generously in the forward bends and only very mild stretching, if any. Once the acute phase has passed, you can begin to add gradual stretching.


Nurse your hamstrings back to health

Try this short 3-stage yoga practice to gradually heal your injured hamstrings. You can also use this practice to release chronic tension in your hamstrings.


Pain in the butt #2: Outer/upper butt pain.

I have a client who came to me complaining about the pain in the hip that interfered with her walking and sleeping. She has been to a PT who suggested core strengthening, an orthopedic surgeon who diagnosed her with piriformis syndrome, and LMT who treated her for a tight IT band. After careful exploration we have determined that the location and symptoms of her pain were pointing toward the weakened abductor muscles, which caused a displacement of the pelvis and a host of muscle compensation patterns. We began to work on strengthening her abductors and shortly after her pain was gone.

Location: This type of pain usually shows up in the upper or outer buttock area and can resonate down on the side of the leg. It usually gets worse during walking and while lying on the affected side at night.

Offender: Weak abductor(s), tight IT band can be a contributing factor

Reason: This pain is often due to some sort of an asymmetrical movement pattern that goes on for an extended period of time (read more about adductor/abductor imbalance).

Common remedy: This pain is often perceived as an IT band issue and remedied by stretching the IT band or using the roller to apply pressure to it. This can be very useful, but it does not address the root of the problem – weak abductors. Until those are strengthened, the issue will continue to pop up.

Better solution. You need to strengthen the abductors by using them in the stabilizing role (standing on one leg) and moving role (moving the leg out to the side, preferably against gravity). Here is a sample practice for abductor strengthening.

Pain the butt #3: Central butt pain.

When the Body Worlds exhibit came to town, one of the reasons I went was to check out the structure of the hip, since I do not have ready access to cadavers. Yes, it was creepy at times, but also fascinating. For example, I was amazed at how big the sciatic nerve is – yes, it’s the longest nerve in your body, extending from the lower spine all the way down into the foot, but it’s also very thick – about the thickness of your pinky finger – between your spine and hip area.

Since the nerve is so big and long, it can get pinched at various locations causing all-too-familiar sciatic pain. Two common sites of impingement are the lower back (between the lumbar vertebrae) and underneath the tight piriformis muscle.

Piriformis is a small muscle that can cause a lot of trouble if it gets tight. It sits deep within the hip and its job is to rotate the hip externally and to abduct the leg when the hip is flexed. Tight piriformis by itself can cause the pain in the butt, but situation becomes worse if it presses on the sciatic nerve that passes underneath (and for some people right through) the piriformis muscle.

Location: The pain can show up in the middle of the buttock, in the lower back or anywhere along the pathway of the nerve. It can also manifest as numbness or weakness in the leg.

Offender: Herniated disks, bone spurs on the vertebrae or tight piriformis muscle

Reason: Sitting or driving a lot, degenerative changes in the spine with age

Common remedy: If the sciatic pain is due to a herniated disk, it is a much bigger issue and is beyond the scope of this post. Core strengthening under the guidance of a physical therapist would be the best solution. If the pain is due to the tight piriformis muscle, we can work on releasing the muscle tension. The most commonly recommended pose for the tight piriformis is Pigeon pose. Unfortunately, for many people with this type of pain this is too much, too soon. Pigeon pose places the piriformis in the maximum stretched position and pulls strongly on the sciatic nerve as well. This means that if the pain is acute, getting onto the Pigeon can make it feel worse.

Better solution: It makes much more sense to utilize our usual Contract-Relax-Stretch principle.

Step 1. We begin by contracting the SURROUNDING muscles (particularly gluteus maximus) to increase the blood flow into the general area.

Step 2. Then we can gently contract the piriformis muscle itself, asking it to relieve the chronic contraction (only if it doesn’t cause pain) in combination with gentle stretching. Poses like Virabhadrasana 2, Utthita Parsvakonasana and versions of clam shell will contract the piriformis, while simple standing twist with a chair and Ardha Matsyendrasana would be good options for stretching it (since they place your leg into flexed/adducted position without the external rotation element, which is milder for piriformis).

Step 3. When you are ready to add the external rotation element to your stretching, it’s better to choose Thread-the-needle pose instead of Pigeon, or Gomukasana on the back instead of the full form of the posture, which will apply less leverage against your piriformis. Only after practicing those you’ll be ready for Pigeon or Gomukasana (and some students won’t be ready for a long time if ever).

In addition, it makes sense to relieve chronic contraction in the adductors, since tight adductors can internally rotate the leg, placing additional stress on the piriformis muscle. Tight hamstrings can also irritate the sciatic nerve, so it is useful to relieve tension there. Keep in mind, that even the simplest hamstring stretches can be very painful to a student with sciatica, so it’s best to follow the same principle for hamstring work that we’ve outlined in Pain in the butt #1.

So there you have it. Keep in mind that sometimes there can be multiple things going on, so if your pain persists despite your best efforts, it’s probably time to seek professional help.

Here is a sample practice to relieve tension in the piriformis muscle, using all the principles we’ve outlined above.


Written by Olga Kabel. For the full article visit here.

One Simple Move to Loosen Up Your Shoulders

There are many suggestions on the internet on how to “loosen up the shoulders”. Most of them boil down to bringing the shoulders through the full range of motion: do several flexion-extension moves, few adduction-abduction moves, some internal rotation, some external rotation and some combinations of the above. Many yoga teachers do those at the beginning of their classes as well. There is nothing wrong with that, but you might end up having limited success with those because

A. Moving the arm without moving the spine is not nearly as effective
B. In real life we rarely do “pure” anatomical movements (ex: pure flexion or pure extension). We usually move the arms along complex trajectories that involve different combinations of more basic motions. That’s why when we attempt to “loosen up the shoulders” it makes sense to do more complex, integrative movements.

What if I told you that there is one move that combines ALL of the anatomical shoulder movements and brings the shoulder through the full range of motion? Any time you feel your shoulders tightening or your neck tensing, all you have to do is add this move to 2-3 yoga poses and you’ll be all set!

First let’s take a look at the kind of movement that’s possible in your shoulders.

You could theoretically work with each one of those movements individually, OR you could combine them into the following move – side arm sweep. Let’s analyze this motion.

We begin with the arm folded behind the back, which places your shoulder into extension, adduction and internal rotation. When you sweep the arm out to the side you move through abduction (away form the body), then external rotation (to turn the palm up), then flexion (when the arm arrives at the top) with slight external rotation (since the palm is facing in). On the way down we are reversing the process, moving through adduction (toward the midline) – extension (behind you) – internal rotation (folding the arm behind the back). To take it even further you can try reaching toward the opposite shoulder blade with your fingertips. As you can see, we just took the shoulder through the full range of motion. On top of that, if you turn your head to look at your hand when the arm is up, and turn the head away from the moving arm on the way down, you will also alternately stretch and strengthen the muscles on the side of your neck that bind the shoulder girdle to the cervical spine and your head, which will help loosen up the neck in addition to your shoulder.

Try this movement by itself and you will feel the impact it has on your shoulders and neck. If you add this movement to other yoga poses, you will also involve the rest of your spine. This will make the effect even more pronounced, especially if you add it to the variety of spinal movements (forward bend, back bend, lateral bend).

For the full article visit here.
Originally appeared on sequencewiz.org and was written by Olga Kabel.