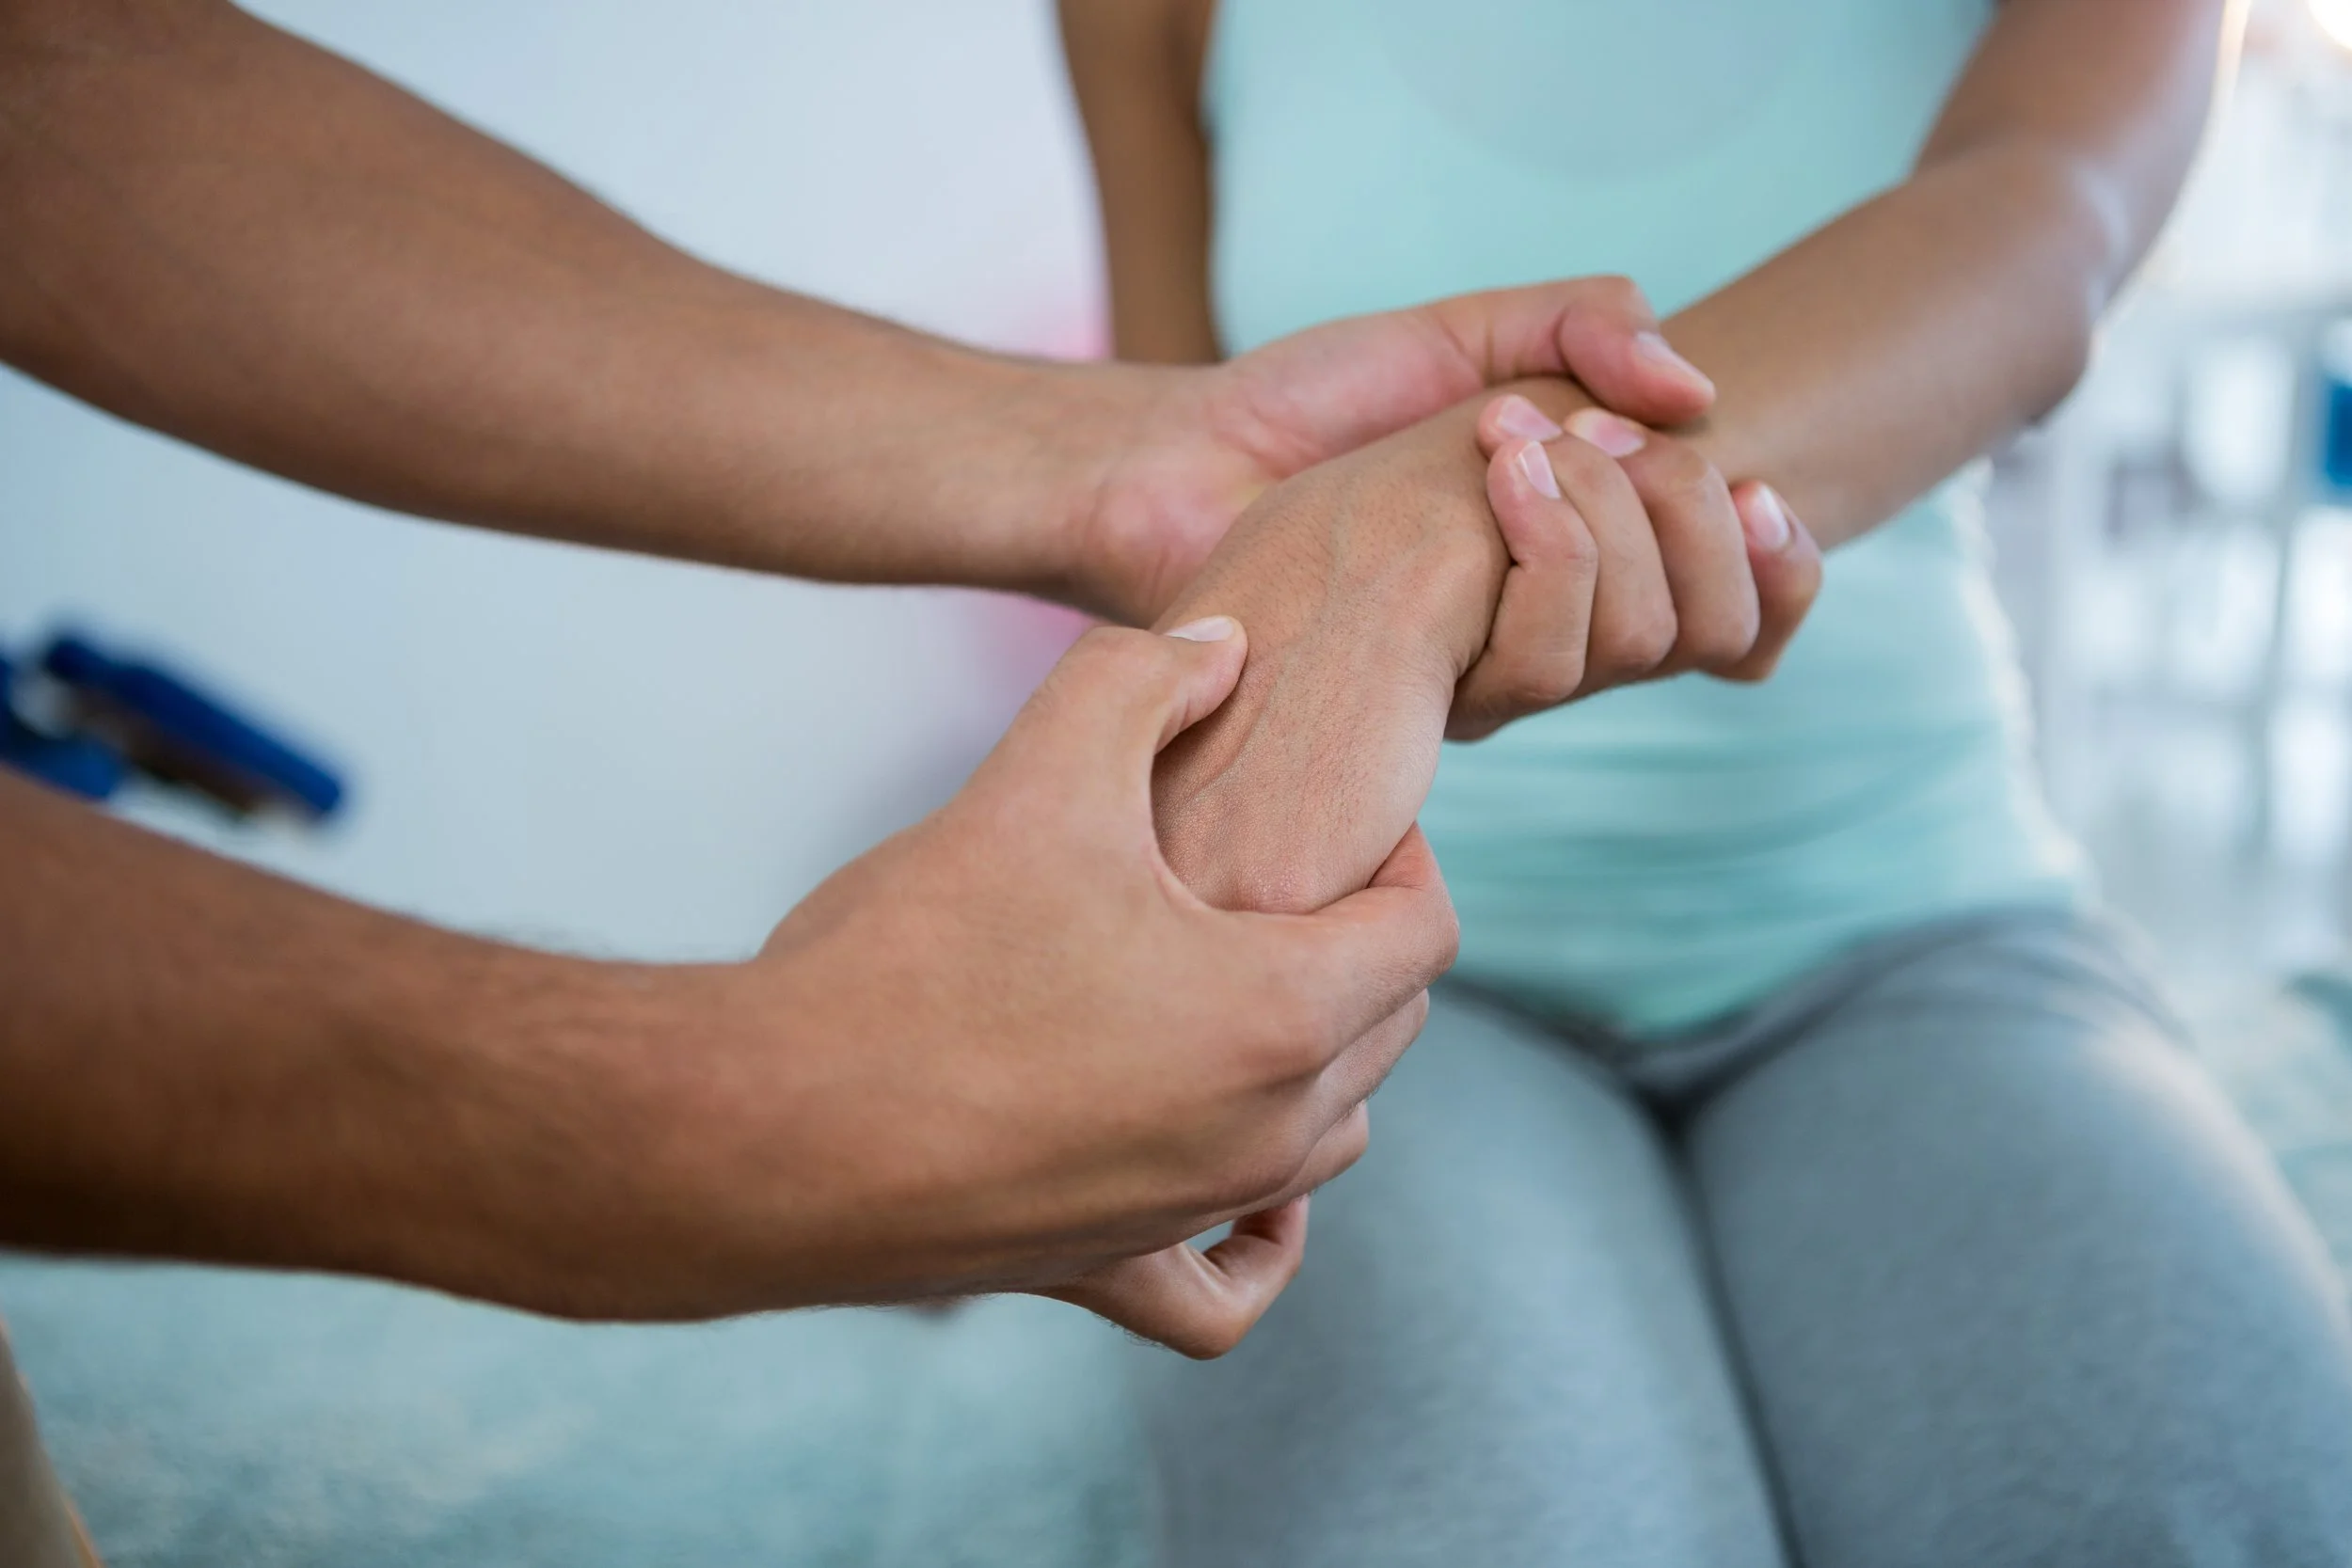
Trish Jones knew trouble was brewing when her right shoulder began to throb during her favorite yoga class. The 29-year-old was no stranger to such pain. She had suffered from unstable shoulder joints for years. Her doctors call it “multidirectional instability,” but Jones refers to it as “having loose nuts and bolts.” So loose that in 1995 she had surgery to stabilize her left shoulder. Last summer, when pain began to gnaw at her other shoulder, she couldn’t shake the feeling that it was in trouble, too.
Still, Jones kept practicing Ashtanga three times a week at a studio near her home in Alexandria, Virginia, in hopes that the pain would work itself out. That is, until her right shoulder dislocated in Vasisthasana (Side Plank Pose). “Luckily, I knew exactly what happened, so I went out into the hall and popped it back in,” she says. Still, the incident served as a wake-up call. She knew the way to dodge a second surgery was to figure out how yoga could build up her shoulder strength without aggravating the instability.
After her injury, Jones switched to a restorative yoga practice and sought advice from yoga teachers, physical therapists, and doctors. Two weeks later, she was back at the studio. Under the close supervision of her teacher, she modified every pose in the Ashtanga primary and second series to spare her shoulder. They jettisoned all weight-bearing asanas, like Adho Mukha Svanasana (Downward-Facing Dog Pose) and Chaturanga Dandasana (Four-Limbed Staff Pose), and took an easy-does-it approach to shoulder openers, like Marichyasana I (Marichi’s Twist I.) “It was a much different practice than the typical first series,” Jones says, “but it wasn’t in my best interest to stop practicing altogether.”
Although Jones was eager to build strength in the damaged joint, she knew the only way to thwart another dislocation was to perfect her alignment. So she analyzed her shoulder position in every pose. To prevent rounding forward in the front of the shoulders, she started each asana by widening her collarbones. To protect the back of the joints, she made sure her upper back was engaged, with the bottom tips of the shoulder blades drawing together and down. Soon, these shoulder adjustments became a meditation in themselves.
As Jones found out, yoga can be a boon to the shoulders, but it can also be a bust. While an intense yoga class can leave your shoulder muscles a little sore the next day, you shouldn’t steamroll past any sharp or throbbing pain in the joint during or after practice. If your shoulders start to gripe whenever you roll out your mat, it’s time to tune in and figure out what’s going on before you do more harm than good. If your shoulders are free of trouble, don’t be overconfident: Now is the time to protect them from future injury. Either way, your shoulders will thank you, and your yoga practice will be stronger.
How it Works
Shoulder problems shouldn’t be shrugged off. In 2003 (the latest year for which numbers are available), nearly 14 million Americans visited a doctor complaining of a bum shoulder. Joint instability, like Jones’s, is one of the most common ailments. Others include impingements, rotator cuff tears, and arthritis.
Athletes often suffer disproportionately from shoulder injuries because the various repetitive movements stress the joints, says Jeffrey Abrams, an orthopedic surgeon in Princeton, New Jersey, and a spokesperson for the American Academy of Orthopedic Surgeons. “In other countries people play soccer, but here we like to ski and play golf and tennis, all of which are hard on the shoulders.” Jones is a typical example—when she was younger she played basketball and tennis and loved rock climbing. Now she puts her shoulders through their paces in Ashtanga.
But there’s another factor at play—the natural structure of the joint. “Shoulders are designed for mobility, not stability,” says Roger Cole, Ph.D., an Iyengar-certified teacher in Del Mar, California, who teaches workshops on shoulder safety. The mobility allows for an astonishing range of motion compared to that in the hips—if you have healthy shoulders you can move your arms forward, back, across the body, and in 360-degree circles. But the relatively loose joint relies on a delicate web of soft tissue to hold it together, which makes it more vulnerable to injury. (The soft tissue includes ligaments, which connect bone to bone; tendons, which attach muscle to bone; and muscles, which move and stabilize the bones.)
The main ball-and-socket joint is also quite shallow, adding to the flexibility but putting the joint at risk. Abrams likens it to a basketball sitting on top of a plunger. (The basketball is the head of the humerus, or upper arm bone, and the plunger is where it meets the scapula.) The rotation of a big ball on a little base makes the shoulder mobile.
When the soft tissue around the joint is strong and toned, the system works flawlessly. But factor in years of repetitive roundabout movements, like throwing a baseball, swimming, or even stretching the arms overhead in yoga, and shoulder ligaments can overstretch and lose elasticity, like worn rubber bands. Plus, as muscles age, they lose tone, making it even more likely that the ball will slip off the plunger at some point. The best way to stay out of a sling? Be diligent in your quest for proper alignment and build balanced strength around the joint to create stability.
Check your Alignment
Sounds easy enough, but here’s the hitch: Perfect shoulder placement in yoga can be elusive. For starters, unless you practice yoga in a mirror-lined room or have eyes in the back of your head, it’s tough to know what your shoulders are up to. To make matters worse, poor posture is habitual. If your shoulders slouch, slump, or cave all day long, you can’t help but bring a few bad habits into the yoga studio. “I see a lot of students with shoulders that slope, turn in, and jut forward,” says Mitchel Bleier, a senior certified Anusara Yoga teacher in Rochester, New York. “If those misalignments are maintained during yoga practice, especially during weight-bearing asanas, the risk of a shoulder injury goes up dramatically.”
Therefore, weight-bearing poses, such as inversions, require extra vigilance. Inversions are safe for the shoulders, Cole explains, but they are best performed with precise alignment.
The first step in understanding correct shoulder alignment is to start simply, by exploring Tadasana (Mountain Pose) and Urdhva Hastasana (Upward Salute). Here are Bleier’s alignment instructions for his students in Tadasana: First, lift your shoulders slightly so they line up with the base of your neck. Simultaneously, draw the heads of the arm bones back, toward the wall behind you. Keeping a slight curve in the back of your neck, draw your shoulder blades down toward your waist. Your shoulder blades should lie flat on your back, instead of winging out. Feel your chest rise, but resist the temptation to pinch your shoulder blades together—doing this will only compress your spine. Instead, keep the bottom tips of your shoulder blades pressing into your back and spreading. If you want to feel deliciously supported while doing this, try the Strap Jacket.
Reaching your arms overhead is a little more complex, but once you learn to do it correctly, you can apply the same principles in poses such as Downward-Facing Dog, Plank, or Adho Mukha Vrksasana (Handstand). Before you sweep your arms up into Urdhva Hastasana, it’s important to rotate your arm bones externally and move them down so the head of the arm bone is in the socket. This will strengthen the muscles on the back of the rotator cuff (the infraspinatus and teres minor), which are typically weaker than the front, and it will spare the supraspinatus, which can get pinched between the edge of the scapula and the head of the arm bone when the arms lift. If the tendon is pinched repeatedly, it wears and frays like a rope. Eventually, what begins as a mild irritation can progress to a severe injury, such as a tear.
Once your arms are straight overhead, you don’t have to pull your shoulders down quite so firmly, because that will inhibit your ability to reach up. To get the maximum reach safely, start in Urdhva Hastasana and spread your shoulder blades away from each other. As your shoulder blades wrap around toward the front of your rib cage, you should have more space to really lengthen up. The tops of your shoulders will lift slightly, which is OK. Just don’t let them bunch up by your ears. Now keep your shoulders in place and press your palms up toward the ceiling. Feel familiar? This is similar to the placement for Handstand.
Counteract Misalignment
Once you’ve mastered the ins and outs of proper alignment, you should be ready to build the strength to maintain it. And therein lies the rub. Done correctly, yoga poses strengthen the shoulders, but in order to do them correctly and maintain proper alignment, your shoulders have to be strong. Of any yoga pose, Chaturanga Dandasana (Four-Limbed Staff Pose); exemplifies this—if you’re not strong enough to keep your shoulders in their proper place, you leave yourself wide open to injury.
The most common misalignment is to collapse the chest and allow the heads of arm bones to drop forward toward the floor. You’ll know this is happening if your shoulder blades poke out instead of lying flat on your back, or if the fronts of your shoulders are sore the next day. This can strain the front of the rotator cuff and can also build strength unevenly, making the front of the rotator cuff stronger than the back. Over time this imbalance will pull the arm bone forward, contributing to a vicious cycle of misalignment.
To counteract this, start in Plank Pose, and as you move into Chaturanga Dandasana, see that the heads of the arm bones stay level with the elbows. Try not to let them dip down. (Practice at home in front of a mirror.) If they drop, you need to build more strength around the whole rotator cuff. To do that, practice Chaturanga with your knees on the floor and the Supine Sleepwalker Pose.
You can also practice what Cole calls the anti-Chaturanga, or Purvottanasana (Upward Plank Pose). “Purvottanasana stretches most of the muscles that Chaturanga strengthens and also strengthens opposing muscles,” Cole says. It’s one of the poses Trish Jones credits for helping her escape another shoulder surgery. “My rotator cuffs are stronger since I’ve adopted Purvottanasana into my practice,” she says. Finally, stretch the front of the chest by doing Setu Bandha Sarvangasana (Bridge Pose), Sarvangasana (Shoulderstand), and Matsyasana (Fish Pose).
Strengthen and Stabilize
To stabilize the joint and reinforce the rotator cuff, you’ll also need to focus on your supraspinatus, the muscle that helps you lift your arms out to the side. More specifically, the supraspinatus engages during the first 30 degrees of lifting the arms. Once your arms are shoulder level, your deltoids hold them up, which won’t strengthen the rotator cuffs. To strengthen the supraspinatus, practice standing poses where you reach the arms out, such as Trikonasana (Triangle Pose) and Virabhadrasana II (Warrior II). Hold the poses for five breaths and bring your arms down and back up between each pose.
Once you feel ready—meaning, the head of the arm bone isn’t slipping around and the joint is free of pain—toss a few weight-bearing poses into the mix. One of the best ways to build strength around the rotator cuff is to move slowly from Downward-Facing Dog out to Plank and back again. Just be careful not to let the upper back hyperextend and sink toward the floor in Downward-Facing Dog, which, according to Jean-Claude West, a kinesiologist and master manual therapist, can compress the joints. “Maintaining width in the upper back keeps the shoulder girdle active and the shoulder joints stable as you approach Plank,” he says.
Many yoga poses build arm strength by requiring you to push away from the floor—poses like Downward-Facing Dog, Handstand, and Urdhva Dhanurasana (Upward-Facing Bow Pose)—but few demand that your shoulder muscles pull against resistance, which is part of the reason the back of the rotator cuff gets so weak. One way to build oomph in the back of the shoulders is to engage in activities that require pulling, like swimming or even pull-ups, says Cole. On your yoga mat you can practice poses that require pressing the back of the shoulder joint against the floor, such as Jathara Parivartanasana (Revolved Abdomen Pose), or on a stable part of the body, such as the front leg in Parivrtta Parsvakonasana (Revolved Side Angle Pose).
Finally, create balanced flexibility by practicing poses that require an inward rotation of the shoulder, such as Gomukasana (Cow Face Pose), Marichyasana III (Marichi’s Twist III), and Parsvottanasana (Side Stretch Pose). “If you feel a pinching sensation when you rotate your shoulders inward, you are probably irritating a tendon or other connective tissue,” Cole says, “in which case, let the scapula wing out a little bit.” (Don’t practice these poses if you have a history of dislocation or shoulder instability.)
Although these practice tips are meant to keep your shoulders free of injury, when it comes to pain, it’s important to remember that there are no guarantees in yoga or in life. “Injuries can be a wonderful blessing; they offer us an opportunity to learn, to grow, and to be able to help others,” Bleier says. “We all have asymmetries in our bodies; there is no perfect way for the body to be, and if you have pain, it’s just your body’s way of asking you to examine what you’re doing.”
If anyone has learned that lesson, it’s been Trish Jones. “My shoulder pain has taught me to slow down and take my yoga practice back to basics,” she says. “The journey has been a humbling one, but I know I’m better for it.”
The Shoulder Strengthening Sequence
Supine Sleep Walker
This movement not only trains the heads of the arm bones to stay in the sockets during a wide range of movement but also builds well-rounded strength in the rotator cuff. Lie on your back with your knees bent and feet flat on the floor. Hold a yoga block horizontally between your hands and extend your arms up toward the ceiling. Draw the head of the arm bone into the shoulder socket so both shoulders press into the floor. Keeping the arms long, slowly lower the block overhead. As the block moves toward the floor, the backs of the shoulders may lift off the floor just slightly. But if the shoulders begin to bunch up by the ears, stop the block’s descent, realign the shoulders, and then continue to lower the block until it rests on the floor an arm’s length above your head. Now slowly lift the block back into the starting position while keeping your shoulders stable. Repeat up to 10 times.
Purvottanasana (Upward Plank Pose)
Purvottanasana counteracts the effects of Chaturanga by stretching the pectoralis major, pectoralis minor, and anterior deltoids. Sit in Dandasana (Staff Pose) with your hands several inches behind your hips and your fingers pointing forward. Bend your knees until you can place your feet flat on the floor. Exhale, press your feet and hands down into the floor, and lift your hips until you come into a tabletop position. Straighten your legs one by one and lift your hips still higher without squeezing your buttocks. Press the soles of your feet toward the floor. Lift your chest as high as you comfortably can. Keep the back of your neck long as you slowly drop your head back.
Jathara Parivartanasana (Revolved Abdomen Pose)
Lie on your back with your arms in a cactus position. Bring both feet off the floor and bend your knees until they are directly over your hips and your shins are parallel to the floor. Keeping your arms and shoulders pressing into the floor, exhale and lower your knees to the right. Don’t worry if your knees don’t come all the way to the floor. Instead, focus on keeping your shoulders grounded. Inhale and bring the legs back to center. Exhale to the opposite side. Repeat five times on each side. Keeping the back of your shoulders in firm contact with the floor strengthens the back of the rotator cuff, an area that’s commonly weak. This is generally safe to do if you’re recovering from injury because your body is well supported by the floor.
Standing Rotator Cuff Strengthener
This pose is similar to Jathara Parivartanasana but can be done from a standing position. Stand with your back to a wall. Raise your arms into a cactus position. Pull the heads of the arm bones back until you feel the upper back engage and press into the wall. Keep the tailbone tucked to avoid overarching the lumbar spine. Maintaining firm contact between your shoulders and the wall, and keeping your elbows bent at a 90-degree angle, slowly slide the arms up the wall. Ultimately, you may be able to touch your fingers overhead, but it may take time to get there. The key thing is to keep your shoulder blades flat against the wall. Repeat up to 10 times.
Strap Jacket
Getting the strap set up can be tricky the first time you do this pose, but it’s worth it. The harness supports and stabilizes your shoulder girdle by lifting the fronts of the shoulders up and drawing the bottom tips of the shoulder blades down.
Start in Tadasana and make a large loop in a 10-foot-long strap. (If you don’t have one, you’ll need to hook two straps together to create a big round loop.) Hold the loop behind you and put your arms through it, as though you’re putting on a jacket. Make sure the strap buckle is at the bottom of the loop, so you can reach back and adjust the length of the strap easily. The strap will pass over the tops of the shoulders and under the armpits.
Reach back and take hold of the part of the strap that is lying horizontally behind your neck. Grab this top part of the strap with one hand and pull it all the way down toward the floor. As you pull it down, the bottom part of the strap will pass over it and move up your back, creating a harness.
Reach behind you and twist the strap several times to help keep it in place. Now hold the dangling loop and pull down firmly. When the top part of the strap is pulled all the way down, it should be about hip level. The strap should roll your upper shoulders back and down while pressing your lower shoulder blades into your back. Don’t arch your lower back. Keep your legs and pelvis in Tadasana.
Stay here with your hand pulling down on the strap or, to go a step further, take a dowel or a broom and thread it horizontally through the bottom of the strap. Press your hands down onto the broom. Stay for at least 10 breaths.
Setu Bandha Sarvangasana (Bridge Pose)
According to Iyengar-Certified teacher Roger Cole, when you clasp your hands behind your back in Bridge Pose, you stretch the muscles on the fronts of the arm bones, which makes it more difficult to lift your chest. For this version of Bridge Pose, you’ll use a strap around the ankles to help counteract this.
Lie on your back with your feet flat on the floor and hip-width apart. Your heels should be about six inches away from your buttocks. Place a strap around the front of your ankles and take hold of the strap, one end in each hand. Walk your hands down the strap, toward your ankles. Lightly shrug your shoulders toward your head and roll the heads of your arm bones back, rooting them into the floor. Keeping the backs of your shoulders pressed into the floor, pull on the ends of the strap and begin to lift your chest. Then, by pressing down through your legs and feet, lift your hips toward the ceiling. Lengthen your tailbone toward your knees. Keep pulling on the strap to encourage the heads of the arm bones toward the floor as you breathe and lift your chest.
This article originally appeared on the Yoga Journal and it written by Catherine Guthrie


![Self-regulation “control [of oneself] by oneself"](https://images.squarespace-cdn.com/content/v1/55563e14e4b01769086817cb/1542845645966-PO2HGKF5JLUBM45UIWQ3/wee-lee-790761-unsplash.jpg)